Whisper란?
Whisper는 2022년 9월에 OpenAI에서 공개된 범용 음성 인식 모델(general-purpose speech recognition model)입니다. 다양한 오디오의 대규모 데이터 세트에 대해 학습되며 multilingual speech recognition, speech translation, language identification을 수행할 수 있는 multitasking model이기도 합니다.
Transformer sequence-to-sequence 모델은 multilingual speech recognition, speech translation, spoken language identification, voice activity detection를 비롯한 various speech processing task에 대해 training됩니다. 이러한 테스크는 Decoder에서 예측할 토큰의 시퀀스로 공동으로 표시되므로 단일 모델이 기존 음성 처리 파이프라인의 여러 단계를 대체할 수 있습니다. Multi-task training format은 task specifiers 또는 classification targets 역할을 하는 special token의 집합을 사용합니다.

blog : https://openai.com/research/whisper
paper : https://arxiv.org/abs/2212.04356
github에 테스트 해볼 수 있는 Benchmark model들을 비교 분석해준 표를 보면 총 5개의 모델이 Size에 따라 있으며 4개는 English-only 버전으로 속도와 정확성을 절충할 수 있습니다. 다음은 사용 가능한 모델의 이름과 대략적인 메모리 요구 사항 및 상대 속도입니다.
Whisper-JAX
이 글에는 주로 Hugging Face Transformers Whisper 구현을 기반으로 구축된 OpenAI의 Whisper 모델용으로 최적화된 JAX 코드가 포함되어 있습니다. OpenAI의 PyTorch 코드와 비교할 때 Whisper JAX는 70배 이상(TPU) 빠르게 실행되므로 가장 빠른 Whisper 구현이 가능합니다.
JAX를 GPU상에서 기준으로 보면 기존 모델 Whisper 대비 1분 짜리 오디오 파일은 8배, 1시간 오디오 파일 기준으로는 약 13배 이상 속도 측면에서 개선된 결과를 보여준다고 할 수 있습니다.
JAX 코드는 CPU, GPU 및 TPU에서 호환되며 standalone(파이프라인 사용 참조) 또는 inference endpoint로도 실행할 수 있습니다.
개발 환경은 다음과 같고, nvidia-driver, CUDA, CUDNN, Anaconda가 설치되어있다고 가정하고 진행하겠습니다.
Develop Environment
OS : Ubuntu 22.04
GPU : NVIDIA GeForce RTX 4090
CUDA : 11.8
CUDNN : 8.6
Python : 3.9
ffmpeg 설치
먼저 오디오 파일을 다루는 소스코드 이므로 ffmpeg 설치가 필수입니다.
ubuntu에서 ffmepg 를 설치하려면 다음과 같이 다운로드 받아줍니다.
$ sudo apt update && sudo apt upgrade
$ sudo apt install ffmpeg
잘 다운로드 됐는지 확인해보겠습니다.
$ ffmpeg -version
Anaconda 가상환경 생성
Anaconda가상환경을 만들고 소스코드를 다운받은 후 환경 설정을 해보겠습니다.
파이썬 구성환경 Anaconda에서 가상환경을 생성하여 구성합니다.
$ conda create -n whisper-jax python=3.9 -y
$ conda activate whisper-jax
Whisper-JAX source code 다운로드
이제 github repository를 다운받습니다.
official Whisper-JAX github : https://github.com/sanchit-gandhi/whisper-jax
GitHub - sanchit-gandhi/whisper-jax: JAX implementation of OpenAI's Whisper model for up to 70x speed-up on TPU.
JAX implementation of OpenAI's Whisper model for up to 70x speed-up on TPU. - GitHub - sanchit-gandhi/whisper-jax: JAX implementation of OpenAI's Whisper model for up to 70x speed-up on TPU.
github.com
$ git clone https://github.com/sanchit-gandhi/whisper-jax.gitJAX 설치
Whisper JAX는 Python 3.9, JAX version 0.4.5로 테스트 했다고 합니다.
먼저 official JAX github에 들어가서 JAX를 설치해 줍니다.
official JAX installation guide: https://github.com/google/jax#installation
GitHub - google/jax: Composable transformations of Python+NumPy programs: differentiate, vectorize, JIT to GPU/TPU, and more
Composable transformations of Python+NumPy programs: differentiate, vectorize, JIT to GPU/TPU, and more - GitHub - google/jax: Composable transformations of Python+NumPy programs: differentiate, ve...
github.com
참고) Windows 환경 관련 이슈
Jax Github에서 Installation 부분을 보시면
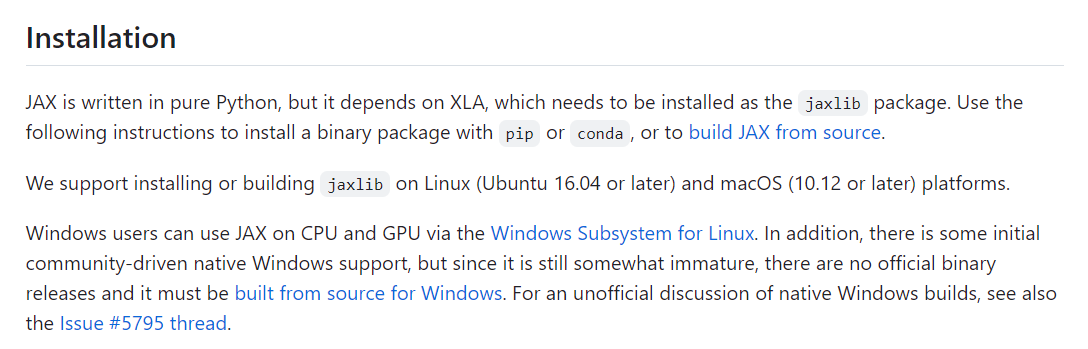
다음과 같이 Windows환경에서는 pip install jax-lib 를 통해 jax-lib가 설치되지 않는 이슈가 존재하여 WSL를 사용하여 Linux환경에서 구축하시거나 별도의 building 과정이 필요합니다.
참고하시어 추가 내용 확인해 보시면 되겠습니다.
우리는 Anaconda 가상환경으로 구성하기로 하였으므로 Conda installation부분으로 내려가 차례대로 해보겠습니다.
커뮤니티에서 지원하는 jax의 Conda 빌드가 있습니다. conda를 사용하여 설치하려면 다음과 같이 수행합니다.
수정) 하지만 conda-forge를 통해 설치하면 GPU를 잡지 못하는 이슈가 발생하여
WARNING - No GPU/TPU found, falling back to CPU. (Set TF_CPP_MIN_LOG_LEVEL=0 and rerun for more info.)
pypi 채널인 pip로 설치하도록 통일하였다.
pip 를 활용한 JAX 설치
(whisper-jax)$ pip install --upgrade pip

# CUDA 12 installation
# Note: wheels only available on linux.
(whisper-jax)$ pip install --upgrade "jax[cuda12_pip]" -f https://storage.googleapis.com/jax-releases/jax_cuda_releases.html

# CUDA 11 installation
# Note: wheels only available on linux.
(whisper-jax)$ pip install --upgrade "jax[cuda11_pip]" -f https://storage.googleapis.com/jax-releases/jax_cuda_releases.html
자신이 설치한 CUDA 버전에 맞게 CUDA 12.xx 버전은 위에 pip 라인, CUDA 11.xx는 아래 pip 줄을 선택해서 설치해 주시면 됩니다.
Whisper-JAX 설치
적절한 버전의 JAX가 설치 되면 pip를 통해 Whisper JAX 설치할 수 있습니다.
(whisper-jax)$ pip install git+https://github.com/sanchit-gandhi/whisper-jax.git
여기까지 하면 conda 환경에서 jax와 whisper-jax가 모두 설치가 완료되었습니다.
테스트 코드 실행
실제 속도를 비교해 보기 위해 Pipeline Uasge에 있는 예제 파일을 돌려보겠습니다.
Whisper JAX를 실행하는 권장 방법은 FlaxWhisperPipline 추상화 클래스를 사용하는 것입니다. 이 클래스는 필요한 모든 전처리 및 후처리를 처리할 뿐만 아니라 가속기 장치에서 데이터 병렬 처리를 위한 생성 메서드를 래핑합니다.
Whisper JAX는 GPU/TPU 장치 간 데이터 병렬화를 위해 JAX의 pmap 기능을 사용합니다. 이 함수는 처음 호출될 때 JIT(Just In Time) 컴파일됩니다. 그런 다음 함수가 캐시되어 초고속으로 실행될 수 있습니다.
from whisper_jax import FlaxWhisperPipline
import time

# instantiate pipeline
pipeline = FlaxWhisperPipline("openai/whisper-large-v2")

# JIT compile the forward call - slow, but we only do once
start_time = time.time()
text = pipeline("KsponSpeech_000001.mp3")
end_time = time.time()
execution_time = end_time - start_time

print("Transcribed text:", text)
print("Execution time:", execution_time, "seconds")

# used cached function thereafter - super fast!!
start_time2 = time.time()
text2 = pipeline("KsponSpeech_000002.mp3")
end_time2 = time.time()
execution_time2 = end_time2 - start_time2

print("Transcribed text:", text2)
print("Execution time:", execution_time2, "seconds")
Output :
Transcribed text: {'text': ' 아 뭔소리야 그건 또'}
Execution time: 13.35602593421936 seconds
Transcribed text: {'text': ' 나는 악습은 원래 없어져야 된다고 생각하긴 했는데 근데 약간 필요 악으로 하나 정도쯤은 있어야 되거든 물 들어가고'}
Execution time: 0.6231608390808105 seconds
실행 결과 약 20G의 GPU memory를 사용하고 다음 첫번째 pipeline결과는 약 13초 가 걸렸지만 2번째 pipeline에서는 약 0.6초로 매우 빠른 수행 결과를 보여주는 것을 확인하였습니다.
Whisper Training Code
참고로 Training Code는 현재 23년 5월 기준으로도 아직 공개 하지 않고 있고, 여러 개발자들이 paper와 code를 참고하여 작성한 파일들을 나중에 저도 보기 위해 기록해 두겠습니다.
https://huggingface.co/blog/fine-tune-whisper
Fine-Tune Whisper For Multilingual ASR with 🤗 Transformers
Fine-Tune Whisper For Multilingual ASR with 🤗 Transformers In this blog, we present a step-by-step guide on fine-tuning Whisper for any multilingual ASR dataset using Hugging Face 🤗 Transformers. This blog provides in-depth explanations of the Whispe
huggingface.co
https://colab.research.google.com/drive/1P4ClLkPmfsaKn2tBbRp0nVjGMRKR-EWz?usp=sharing
AudioWhisper_Train_v00001.ipynb
Colaboratory notebook
colab.research.google.com
'Artificial Intelligence > Speech Recognition' 카테고리의 다른 글
| Insanely Fast Whisper 리뷰 (0) | 2024.06.05 |
|---|---|
| DeepSpeech에서 Kspon 데이터셋 학습을 위한 환경 구성 (0) | 2023.06.01 |

